I always thought enforcing code formatting and linting was overkill unless you had a fairly large team and having these tools setup say for a small team wasn't really necessary.
But like most things in life, I have never been more wrong. Even on a small team, not automating code formatting left us with 10 long PR comments 8 of which were purely formatting stuff a certain way.
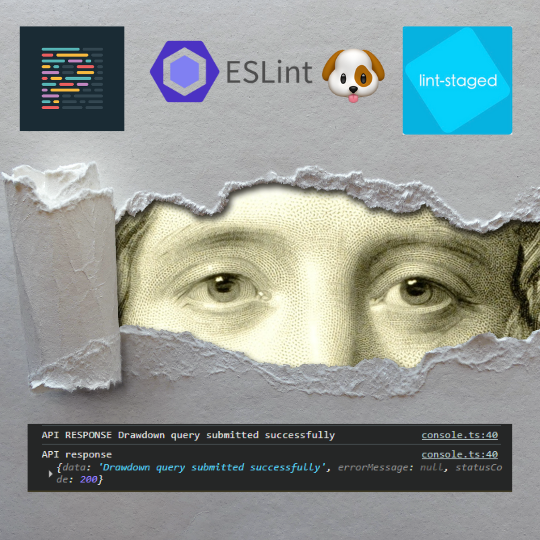
And then because we're only human, ever so often you ship that idiot console.log, then with your bruised pride you have to git commit -m 'Remove console.log'.
Step 1: Configure prettier
npm install --save-dev --save-exact prettier
Create a .prettierrc file at the root of your project
{
    "tabWidth": 4,
    "singleQuote": true,
    "trailingComma": "es5",
    "semi": true,
    "jsxSingleQuote": false,
    "bracketSpacing": true,
    "arrowParens": "always",
    "printWidth": 100,
    "jsxBracketSameLine": false,
    "endOfLine": "lf"
}
This prettierrc is the configuration that’s worked for my team and me, this is the point where you gather your devs and all agree on standards for the repo.
Prettier comes with additional plugins, these plugins can organize imports and do other nifty bits for you. The one I reach out for is the tailwind plugin, using plugins in prettier is straightforward.
You install the plugin: npm install -D prettier prettier-plugin-tailwindcss and then just add it to the plugins array in your .prettierrc file. Your complete config should now look like this:
{
    "tabWidth": 4,
    "singleQuote": true,
    "trailingComma": "es5",
    "semi": true,
    "jsxSingleQuote": false,
    "bracketSpacing": true,
    "arrowParens": "always",
    "printWidth": 100,
    "jsxBracketSameLine": false,
    "endOfLine": "lf",
    "plugins": ["prettier-plugin-tailwindcss"]
}
Lastly you want your editor to help you out, in your editor settings (VS code for me) you need to go Settings > Formatting and turn on Format on Save+ Select Prettier as your code formatter.
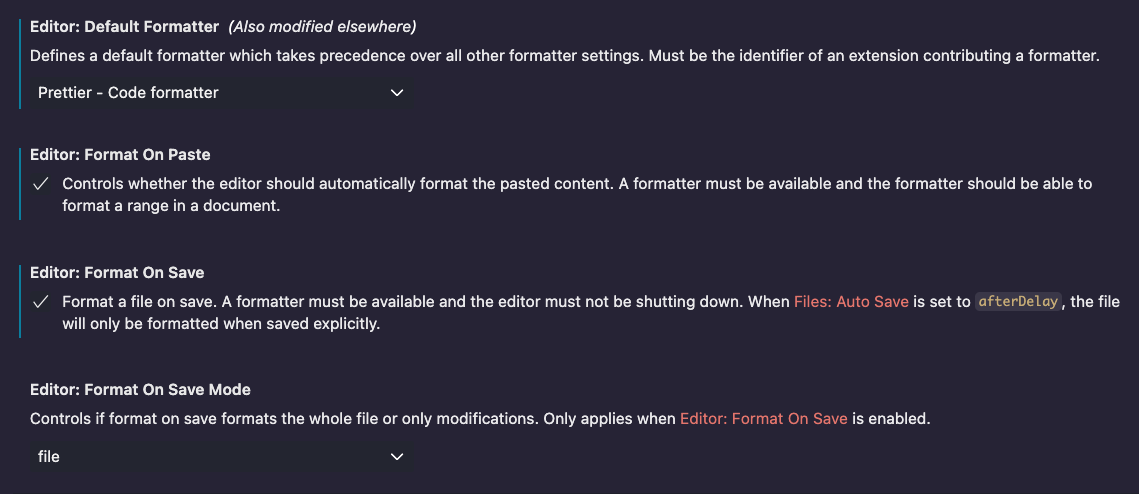
Now every time you save your file prettier will do prettier things.
How to test prettier is working?
- Intentionally mess up the formatting in a code file and hit save. If everythings gone to plan your editor should auto format as per your prettier config.
- (OR) Use the CLI:
npx prettier . --write - Format a single file:
npx prettier src/components/SingleTodo.tsx --write
The final piece of this setup is .prettierignore so that prettier doesn't intervene in files/directories that don't require formatting.
node_modules/
dist/
build/
.github/
Step 2: Configure Eslint
npm init @eslint/config@latest
The CLI will prompt you with options for your project configuration:
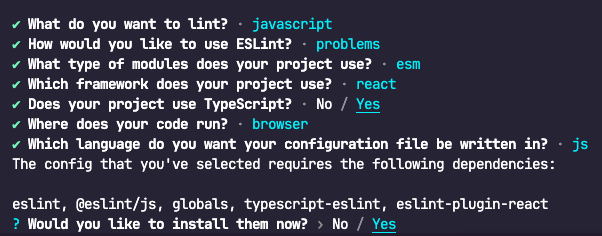
Unlike prettier eslint will auto generate a eslint.config.js config file for you, there’s a extra plugin that comes in very handy:
npm i eslint-plugin-unused-imports --save-dev
import js from '@eslint/js';
import globals from 'globals';
import tseslint from 'typescript-eslint';
import pluginReact from 'eslint-plugin-react';
import { defineConfig } from 'eslint/config';
import eslintPluginUnusedImports from 'eslint-plugin-unused-imports';

export default defineConfig([
{
    files: ['**/*.{js,mjs,cjs,ts,mts,cts,jsx,tsx}'],
    languageOptions: {
        globals: globals.browser,
    },
    plugins: {
        'unused-imports': eslintPluginUnusedImports,
    },
    rules: {
        'no-console': ['warn'],
        'no-unused-vars': [
            'error',
            {
                vars: 'all',
                args: 'after-used',
                argsIgnorePattern: '^_',
            },
        ],
        'unused-imports/no-unused-imports': 'error',
        'react/react-in-jsx-scope': 'off',
    },
},

js.configs.recommended,
tseslint.configs.recommended,
pluginReact.configs.flat['jsx-runtime'],

]);
How to test your Eslint is working?
If you try committing some sins in javascript your editor now powered by Eslint should start moaning at you.
If it doesn't immediately work you can try restarting the ESLint Server.
Just hit Ctrl + Shift + P and select Restart ESLint Server.
You can either:
- Check for the eslint errors first so you’re aware of what needs fixing.
- Let eslint auto fix some of them for you.
To your package.json add the following scripts:
"scripts": {
    "lint": "eslint .",
    "lint-fix": "npx eslint . --fix",
}
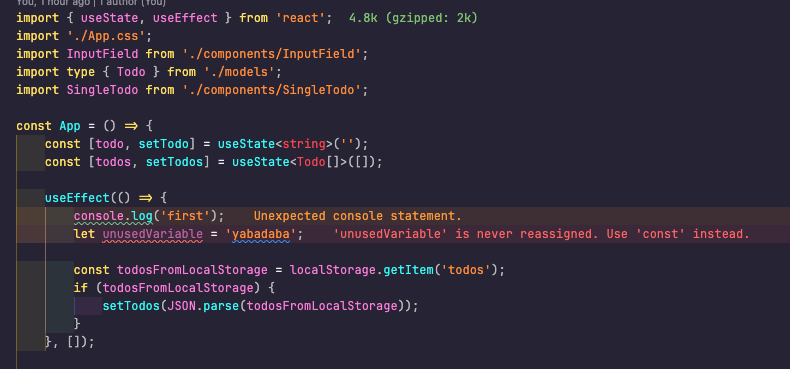
Just run your npm run lint script and voila:

Step 3: Husky + Lint Staged
Husky allows us to hook into pre-commit hooks, so it lets us perform sense checks before we commit our JavaScript changes.
lint-staged (as the name suggests) allows us to run commands only on staged files, so we don't run them across the whole codebase, only the files modified in the current commit.
npm install --save-dev husky lint-staged
Initialize husky: npx husky init
This should create a .husky directory with a file named pre-commit
Modify your pre-commit file as follows:
#!/bin/sh
npx lint-staged
Add the lint-staged command to your package.json file:
"lint-staged": {
    "*.{js,ts,tsx}": [
        "prettier --write",
        "eslint --max-warnings=0",
    ]
},
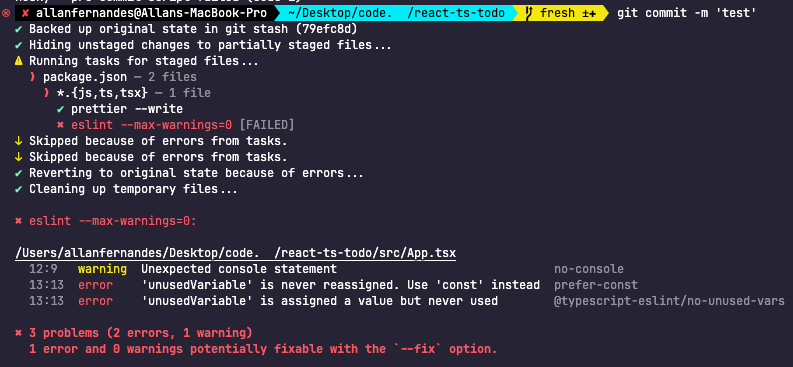
Putting it all together
If you now try committing some hideous code (console.logs / unused variables / unnecessary imports) your CLI is going to tell you to jog on!
Now we have a way to enforce code styles for developers and standardize our codebase and no devs debating in the PR comments on single vs double quotes! Big W!
Bypassing checks
This setup has one critical flaw, it can be easily by-passed!
Let me show you how:
Just adding a -n flag to your commit stops husky from running the pre-commit hook,
git commit -m 'this code is going skip checks lol' -n
Or you can just comment out your lint-staged script all together.
A tactic deployed when you're hotfixing that bug that's brought production to its knees or working past a deadline, common scenarios where code quality takes a back-seat.
The solution? Setting up a Github Action aka (CI/CD) black magic. Now for the sake of brevity I'm going to create a separate article for that bad-boy which you can find here.